This post will document how to setup the DSTAR Commander image for use on a Raspberry Pi / DVMEGA hotspot. I use a Mac. Theses instructions demonstrate how I set up my hotspot using a Mac. These hotspots are great to use and enable you to talk across the globe using an HT on low power.
Outline:
- Burn image to SD Card
- Boot your Pi and VNC into it
- Set up DSTAR Repeater
- Set up ircddb Gateway
- Set up text and email of system information
- Create Remote Control App
- Reboot and Test
- Secure your Pi (Change user password and VNC password)
- Change the Hostname of your Pi
- References
What you will need:
- 16 GB or greater SD card. I love this Lexar card. I don’t recommend PNY. The one I bought failed in a couple of months.
- SD Card Reader (The USB reader that came with my Lexar works great).
- G4KLX image. I have used many of them and prefer DSTAR Commander.
- A VNC Program. I use Jump Desktop on the Mac and iOS they all sync together and work great!
- The Unarchiver application, free in the Mac App Store.
- Software that will let you see devices connected to your network via ethernet. If, like me, you are using an Apple Time Capsule the Airport utility will only show you devices connected wirelessly. Use the iPhone app Fing to get the ip and MAC address of your Pi.
Burn your image to the SD Card:
- Download your G4KLX image.
- Unzip it by double-clicking the .zip file.
- Insert your SD Card in to an SD card reader, insert into your Mac
- Open a Terminal Window. Enter the following command:
diskutil list
Your output should look like the following:
Jarvis: ~: john $ diskutil list
/dev/disk0 (internal, physical):
   #:                    TYPE NAME                    SIZE       IDENTIFIER
   0:   GUID_partition_scheme                        *500.3 GB   disk0
   1:                     EFI EFI                     209.7 MB   disk0s1
   2:       Apple_CoreStorage Macintosh HD            460.1 GB   disk0s2
   3:              Apple_Boot Recovery HD             650.0 MB   disk0s3
   4:      Microsoft Reserved                          16.8 MB   disk0s4
   5:    Microsoft Basic Data BOOTCAMP                 39.3 GB   disk0s5

/dev/disk1 (internal, virtual):
   #:                    TYPE NAME                    SIZE       IDENTIFIER
   0:                     MBP SSD                    +459.7 GB   disk1
                              Logical Volume on disk0s2
                              11B21249-47B3-4FF1-A807-AD81CEC8B910
                              Unencrypted

/dev/disk2 (external, physical):
   #:                    TYPE NAME                    SIZE       IDENTIFIER
   0:  FDisk_partition_scheme                        *32.1 GB    disk2
   1:              DOS_FAT_16 NO NAME                 124.8 MB   disk2s1
   2:                   Linux                         32.0 GB    disk2s2
The disk I want is /dev/disk2
Burn the image to your SD Card with the following command:
sudo dd if=/pathtoimage/DStarCommander_V2.01_dvmega.img of=/dev/rdisk2 bs=1m
Notice that I used “rdisk2” and not disk2. rdisk is the block device that I want to write to. When you run the command, your cursor will be blinking and you will NOT have a command prompt. That is expected. The process is complete when your command prompt returns with an output message that looks something like this:
$ sudo dd if=~/Desktop/DStarCommander_V2.01_dvmega.img of=/dev/rdisk2 bs=1m
Password:
3796+0 records in
3796+0 records out
3980394496 bytes transferred in 48.629522 secs (81851401 bytes/sec)
$
Boot Up Your Pi and VNC Into It
- Insert your SD Card into the Pi, connect an ethernet cable from the Pi to your router, and power up the Pi. The Pi will boot up.
- You will need to know the internal IP address of the pi in order to VNC into it. Use Fing or some other network scanner to find out the IP address of your Pi. Fing will also tell you the MAC address and I recommend that you set up a DHCP reservation on your router using the MAC address so that you can always easily login to your Pi. Note that the ethernet and wireless connections have different MAC addresses so if you want to use both, you will need to set up two different reservations (one wired and the other wireless) on your router.
- Use Jump Desktop or your VNC program of choice to log into your Pi and configure it. Open Jump Desktop and configure a new connection. Replace 10.0.1.123 with the IP address of your Pi. You will be asked for the Pi’s default password which is “raspberry“.

Jump Desktop Settings. Enter ip address of your pi, enter a name, click add. Then double-click to VNC into your pi.
Set Up DSTAR Repeater
When you first VNC to your Pi, your screen will look like the image below. Shut down the DSTAR Repeater and ircddb programs. Then double-click on the “D-Star Config” application on the desktop.
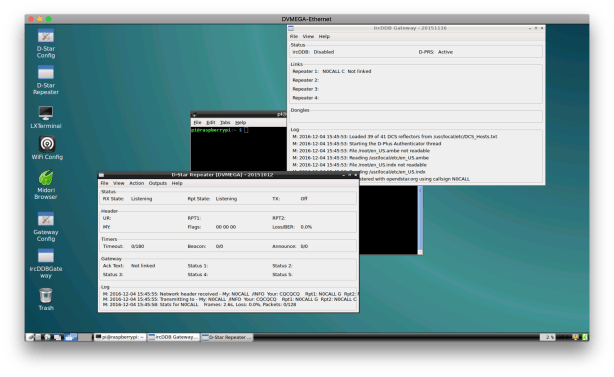
Desktop of your Raspberry Pi
Callsign Tab

DSTAR Repeater Callsign Tab
- Callsign = your call sign
- Select your module (A, B, C, or D)
- Gateway = your call sign
- Mode = Simplex
- Ack = Status
- Restrict = OFF
- RPT1 Validation = OFF
- DTMF Blanking = ON
- Error Reply = ON
Network Tab – No Change (Defaults)
Timers Tab – No Change (Defaults)
Announcement Tab – No Change (Defaults – Disabled)
Beacon Tab
This is optional but I like it. Every 10 minutes, if there is no activity, my pi announces my callsign and module by saying “K-M-4-R-Z-T BRAVO.”
DSTAR Repeater Beacon Tab
- Time = How many minutes you want between beacons
- Message = callsign and module
- Voice = Enabled
- Language = Your chosen language
Click the modem tab
Modem Tab

DSTAR Repeater Modem Tab after choosing DVMEGA and clicking on”Configure…”
- Variant = the band you are using.
- Frequency = your chosen frequency
- TX Delay = 251
- Power = Set percentage depending on your needs.
Control 1 Tab – (Defaults – Disabled)
Control 2 Tab – (Defaults – Disabled)
Controller Tab – (Defaults – None)
Click “File” –> “Save” –> “OK”
CTRL + Q to quit
Setup ircddb Gateway
Double-click “Gateway Config”
Gateway Tab

ircddb Gateway Tab
- Type = Hotspot
- Callsign = your call sign
- Latitude = your latitude in decimal degrees
- Longitude = your longitude in decimal degrees
- QTH = your city, state
- QTH Line 2 = Your country
- URL = your website, if you have one, else leave blank
Click the Repeater 1 Tab
Repeater 1 Tab

ircddb Repeater 1 Tab
- Band = your chosen band (A, B, C, or D). I am using 70cm so “B”
- If you want to have the pi link to a specific reflector on startup you can set it up here.
Click the next Repeater 1 Tab
Second Repeater 1 Tab

ircddb Repeater 1 Second Tab
- Frequency = your chosen frequency
- Range = 2
- Latitude = your latitude in decimal degrees
- Longitude = your longitude in decimal degrees
- AGL = your elevation in meters
- QTH = your city, state
- QTH Line 2 = your country
- URL = the url of your website or leave blank
Repeaters 2-4 – leave as defaults (disabled)
ircddb – (Defaults – Disabled)
D-PRS – (Defaults – Enabled)
DExtra – (Defaults – Enabled)
D-Plus Tab

ircddb D-Plus Tab
- D-Plus = Enabled
- Login = your call sign
Click the DCS and CCS Tab
DCS and CCS Tab

ircddb DCS and CCS Tab
- DCS = Enabled
- CCS = Enabled
- Server = CCS706 (United States Server)
Click the Remote Tab
Remote Tab

ircddb Remote Tab
- Remote = Enabled
- Password = password of your choice
- Port = 10022
The password you use here will be same password you will ned for the Pi Remote Control app (discussed later) and the ircddbremote iPhone/iPad app.
Misc Tab

ircddb Misc Tab
- Language = your preferred language
- Enable everything
“File” –> “Save” –> “OK”
CTRL + Q to quit
Configure Text and Email
Open the terminal
Edit /etc/cmdprocess.conf
cd /etc
sudo nano cmdporcess.conf
- gatewaycallsign=(your call here)
- gatewaymodule=b (or whatever module you are using)
- gatewayfrequency=####### (your 6-digit frequency)
- emailenabled=yes
- textenabled=yes
- emailaddress=youremail@email.com
- textaddress=1234567890@text.att.net
- outboundemailaddress = youremail@gmail.com
- outboundemailpassowrd = password for the outboundemailaddress
- “CTRL + O” to save the file
- “CTRL + X” to exit
Edit /etc/ssmtp/ssmtp.conf
cd /etc/ssmtpsudo nano ssmtp.conf
- mailhub=smtp.gmail.com:587
- AuthUser=youremail@yourdomain.com
- AuthPass=yourpassword
- “CTRL + O” to save the file
- “CTRL + X” to exit
Create a Remote Control Short Cut on the Desktop
The remote control application will enable you to change reflectors from your Pi’s desktop. The same password will also be used for the ircddbremote App on your iphone.
Copy the ircddbgateway.desktop file.
cd ~/Desktop
cp gatewway.desktop remotecontrol.desktop
- A new “ircddb Gateway” icon will appear on your desktop.
- Right-click file -> select “Properties”

Remote Control Desktop Properties – General Tab
- Change the name to “Remote Control”
- Click Desktop Entry Tab

Remote Control Desktop Properties – Desktop Entry Tab
- Command = /usr/local/bin/remotecontrol
- Description = Runs the Remote Control Application
- Tooltip = Application for running remotecontrol
- Click “OK”
- Double-click the “Remote Control” icon on your desktop.
- “Edit” –> “Preferences”

Remote Control Preferences
- Address = the ip address of your pi
- Port = 10022
- Password = the same password you entered in the “Remote” tab of ircddb config.
- Click “OK”
Reboot the Pi and Test
sudo reboot now- VNC into your Pi
- Update hosts by sending the
HOSTUPDTcommand via RF - Link to a Reflector
- From your radio
- From the Remote Control App on the Desktop
- From the ircddbremote iPhone/iPad App
- Send
SYSINFOcommand via RF. You should get an email and/or text from your Pi with the DSTAR Commander version number, hotspot frequency, and the Pi’s local IP address.
Secure Your Pi
Change the password of the “pi” account.
Open a terminal and enter the following command:
passwd
Changing the password of the user “pi”
- Current password = “raspberry”
- Enter your new password twice
Change your VNC Password
In the terminal, enter the following command:
sudo x11vnc -storepasswd
Changing VNC password
You must change change the root VNC password and the user VNC password.
- Enter new password
- Reenter new password
- “y”
Enter the following command in the terminal:
x11vnc -storepasswdThe password you will enter is the same as the one you entered in the previous step.
- Enter new password
- Reenter new password
- “y”
Change The Hostname of Your Pi
If you have multiple Pis or just want to make the name different than “raspberrypi” follows the instructions below.
sudo raspi-config
raspi-config screen. Select advanced options.
- Scroll down to 9 Advanced Options
- Press “Enter”

Select option A2 Hostname
- Scroll down to A2 Hostname
- Press “Enter”

Change hostname instructions.
- Press “OK”
You will see the current hostname of your pi which is “raspberrypi”

Display of current hostname. Change it to whatever you want as long as you follow the previous instructions.
- Change the name to whatever you want ensuring you follow the guidelines in the warning message.

New hostname entered.
- Type in your new hostname
- “TAB” to “OK”
- Press “Enter” on your keyboard
- “TAB” to “Finish”
- Press “Enter” on your keyboard.
You will be asked if you want to reboot now.
- “TAB” to “Yes”
- Press “Enter on your keyboard.
When you reboot, your terminal will now show “pi@newhostname” at the top of the terminal.
Backup Your Image
Follow my instructions here to backup your updated sd card to your Mac.
References
- DSTAR Commander Manual Setup.pdf – found in docs folder of the commander download
- w6kd.boards.net – Reflector Link Commands via VNC
- maryland-dstar.org – Change VNC Password
- PD7L.wordpress.com – ircddb Remote for iPhone and iPad
- darathursdaynite – DSTAR — CCS7 What’s that?
- W6KD Forum – Using CCS7 with DSTAR Commander

Hi John:
What version of Commander did you use? I’m trying to get 2.01 running with a DvMega GMSK modem, Arduino Uno and Rasberry Pi 3B. I see you used “Radio 70cm” in the Variant = the band you are using field. Are you using a GMSK Modem? I wasn’t real sure of this field and used “Modem”. I am having problems. Dstar radio is a Icom 9100 and Simplex repeater radio is a Yaesu FT-1500m.
Todd
AL7PX
LikeLike
Todd, I am using version 2.01. You want to select “DVMEGA.” You can see that is what I selected in the picture. How are you using the DVMEGA with a Raspberry Pi and an Arduino?
LikeLike
Hi John:
Yes I’m using the Dvmega GMSK modem board with Raspberry Pi3 and Arduino Uno. I got it working ok now. I wish I had found your site before I started this whole deal. I’m going to have a high power hotspot at the house. We have no Dstar repeaters here in Anchorage Alaska. There is one north of the city but very hard to connect to due to poor antenna and surrounded in heavily treed area and also low antenna height. I was having trouble getting any support and took me a while to sort things out.
LikeLike
Todd, glad this helped. I’m very interested in how you are going to set up your high power hotspot! Hopefully I’ll hear you on a reflector! -KM4RZT
LikeLike