
Archive for June, 2010
Dual Boot Mac OS X and Linux Mint 9 on a MacBook Pro 5,1
Posted: 2010-06-09 in How To, Unix GeekeryTags: How To, Linux, MacBook Pro, Mint
WARNING: Extreme Geek-Alert!
I’ve been dual-booting Mac OS X and Ubuntu Linux for a while. Recently the upgrade from Ubuntu 9.10 to 10.04 failed. It failed so bad that my computer was unbootable. During the install process, Ubuntu loaded the boot loader to my Mac OS X partition causing the Mac and Ubuntu partitions to overlap. After trying several unsuccessful “fixes” I had to resort to the nuclear option. I formatted the internal hard drive and cloned from one of my two back-ups.
I was going to do a fresh install of Ubuntu 10.04 but decided to try out a different flavor of Linux. The one I chose was Linux Mint. It’s basically Ubuntu but looks a lot nicer (IMHO).
The Mac Installation information in the Ubuntu Community is not very well maintained or updated for Mac specific installs. I decided I would write a post that outlines exactly what I did to get Linux Mint and Mac OS X working on my MacBook Pro 5,1. I imagine that this would also work for Ubuntu as well.
Below is the exact process I used to get a successful dual-boot. I hope this helps you.
Normal disclaimer: I am not a computer scientist. I am an amateur and a hacker. Everything I’ve learned is from trial and error, a lot of error.
PREPARATION:
1. Backup your system by making a bootable clone of your hard drive. I use SuperDuper. Carbon Copy Cloner is also excellent and FREE.
2. Boot from your backup to ensure it is working properly.
3. Make another backup of your system.
4. Boot from your second backup to ensure it is working properly.
5. VERIFY YOU HAVE STEPS 1-4 COMPLETE. I’ve done dual-boot set ups a few times. The nuclear option (formatting your hard drive and cloning from a back-up) is often required. If you value your data, make a back-up…or two.
6. Connect to the internet via Ethernet. You’ll need to have an ethernet connection to update your hardwire drivers. Additionally during the install, if you have an internet connection, the installer will download and install a few other packages.
INSTALLATION:
1. Download the Linux Mint 9 dmg and burn it to a DVD-R. I used this one. 32-bit i386.
2. Verify the MD5 Checksum. Open a terminal window and enter the following command:
MD5 /Users/yourusername/Downloads/linuxmint-9-gnome-dvd-i386.iso
Wait a minute…and the output will reveal the following:
MD5 (/Users/yourusername/Downloads/linuxmint-9-gnome-dvd-i386.iso) = 4d96965a00135a00f7eb4602a8f4b0f1
If you downloaded the .iso to your Downloads folder change “yourusername” to your user name and the command will output a string of numbers and letters. It should match the MD5 checksum on the download page. If they match, continue. If not, re-download until the MD5 checksum matches. The MD5 checksum MUST match. If it doesn’t either the code has been altered or you had a bad download.
3. Use Disk Utility to burn the .iso to a DVD-R. I used the default settings.
4. Download and install rEFIt.
5. Reboot your computer TWICE for rEFIt to take effect. you will know it is installed correctly when you see the rEFIt menu upon initial startup.

6. Repartition your disk using Disk Utility. I created 30GB of Free Space. Most websites say to use Bootcamp Assistant. I used Disk Utility and it worked fine. Click the “+” sign, change the format in the drop down from HFS+ journaled to Free Space. Hit apply.
7. Insert the Linux Mint LiveDVD that you just burned into your DVD drive. Reboot while holding down the “C” key to boot from the Linux Mint DVD.
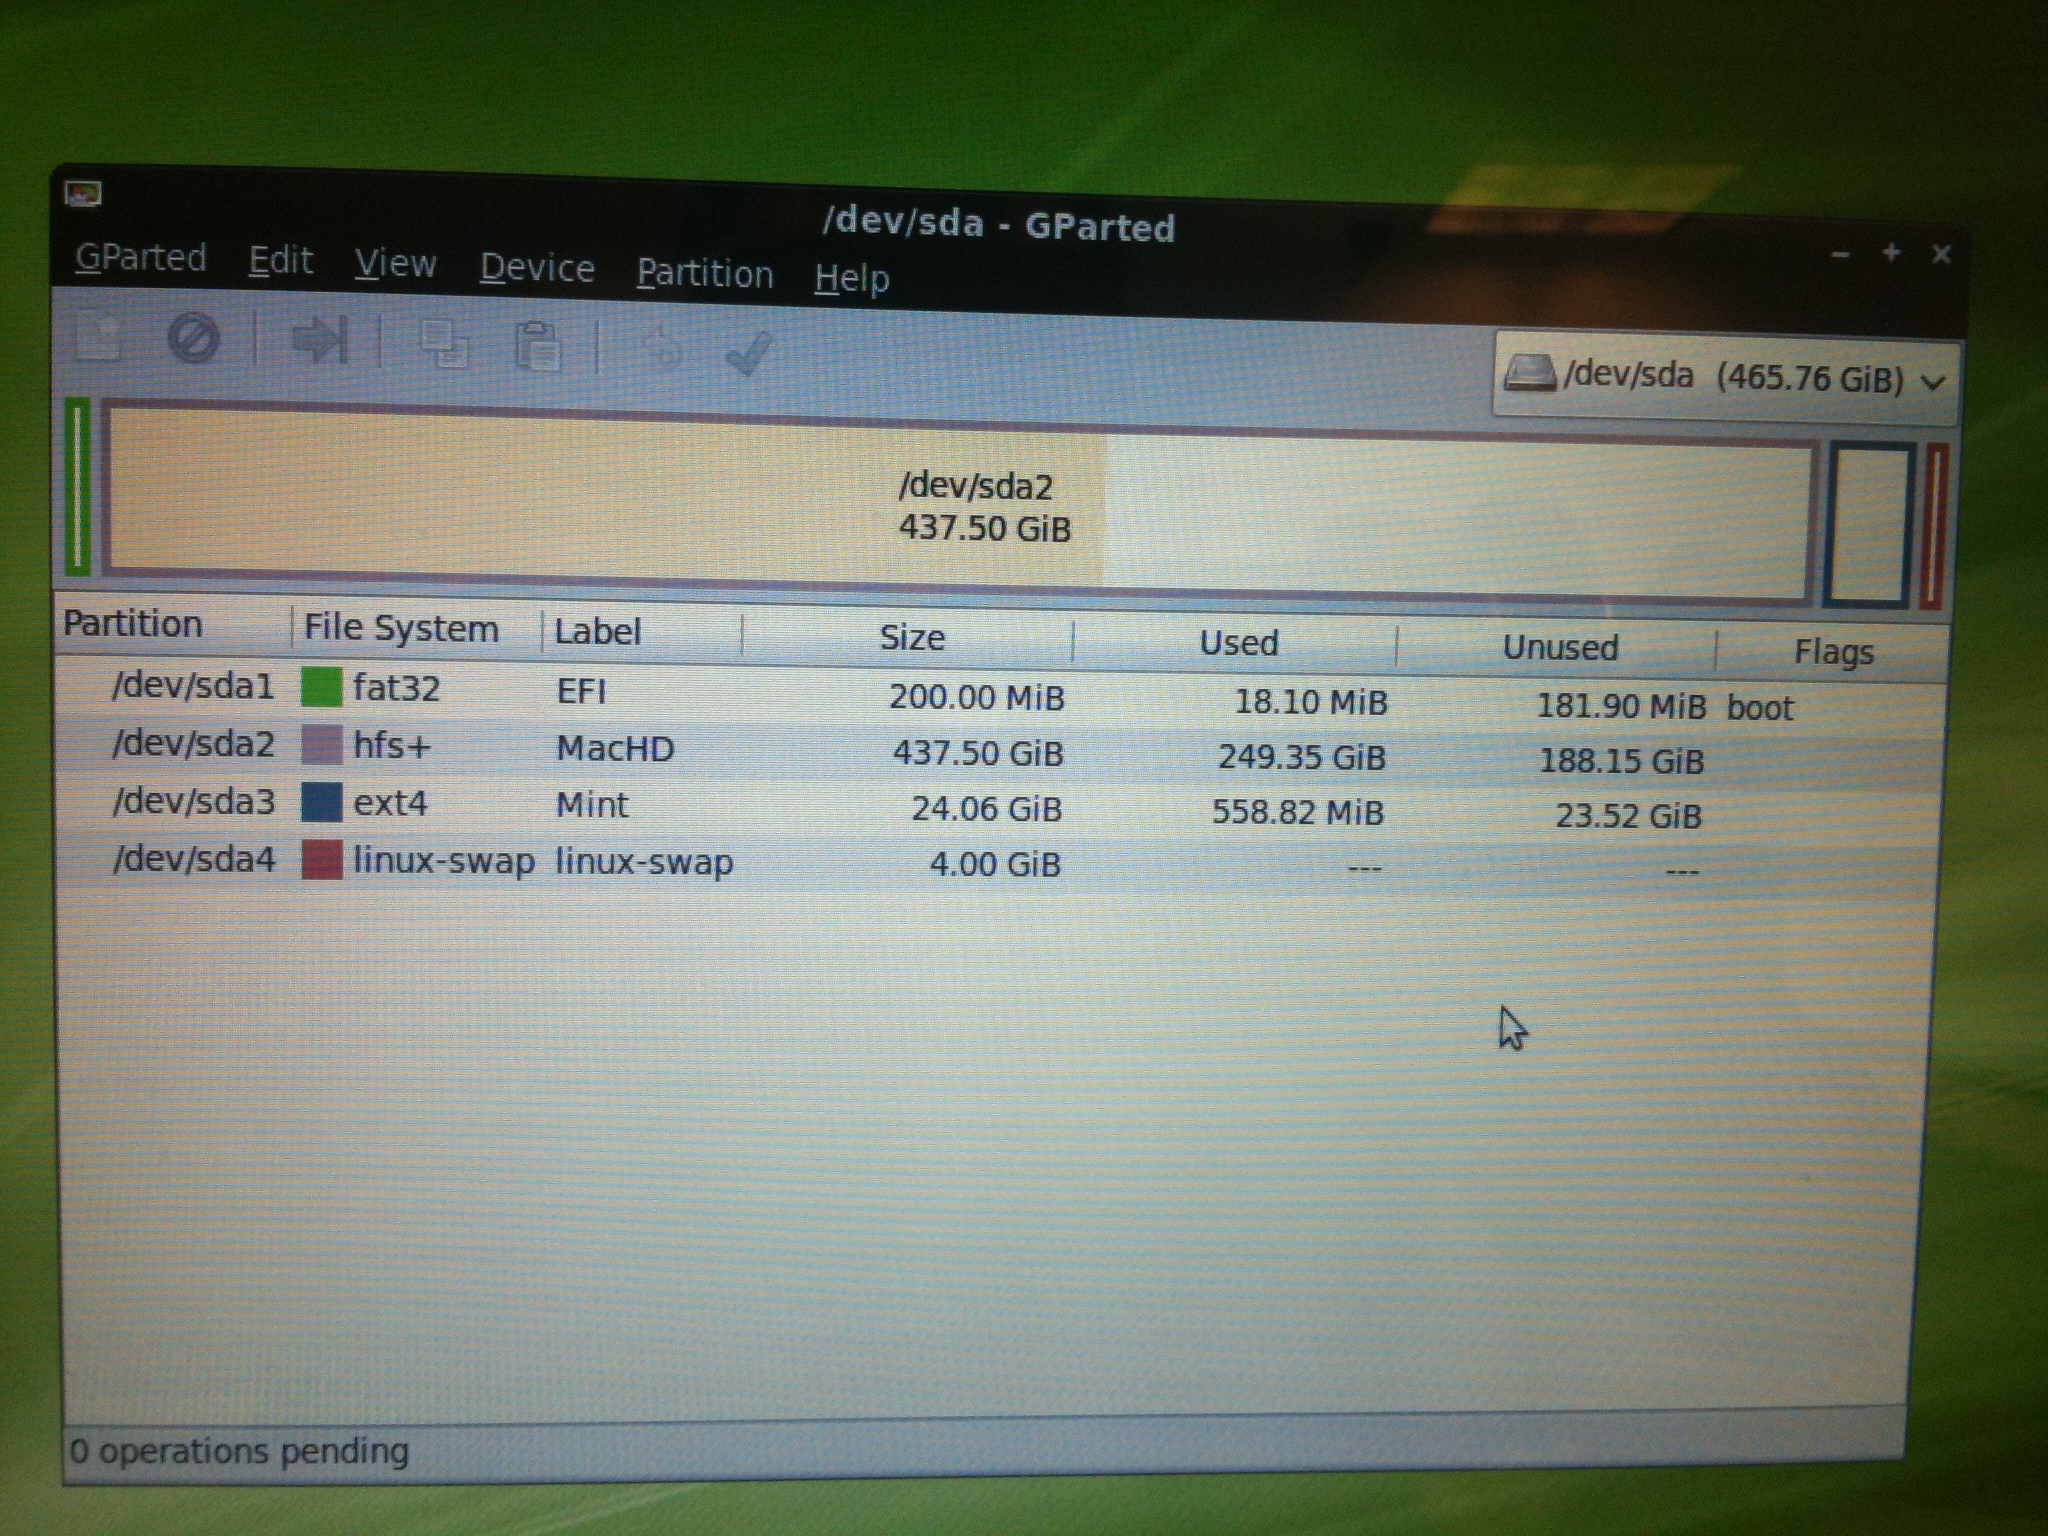
8. Open the GParted application. Create two partitions. Your Linux partition formatted as ext4 and the swap partition. I created my linux partition so that 4096MiB of free space was left for my swap partition. UNCHECK “Round to cylinders” so that you have no free space between partitions. Next, add the final partition. Ensure it is formatted as “Linux-Swap.” Hit “apply” to make the changes. You should now have four partitions.
/dev/sda1 EFI
/dev/sda2 MacOSX
/dev/sda3 Linux
/dev/sda4 Swap
9. Exit GParted and double-click the “Install Linux Mint” icon to begin the installation process. Follow the instructions until you get to Step 4.
10. When you get to Step 4, choose “Specify Partitions Manually.” Proceed to Step 5.
11. Step 5, Specifying partitions.
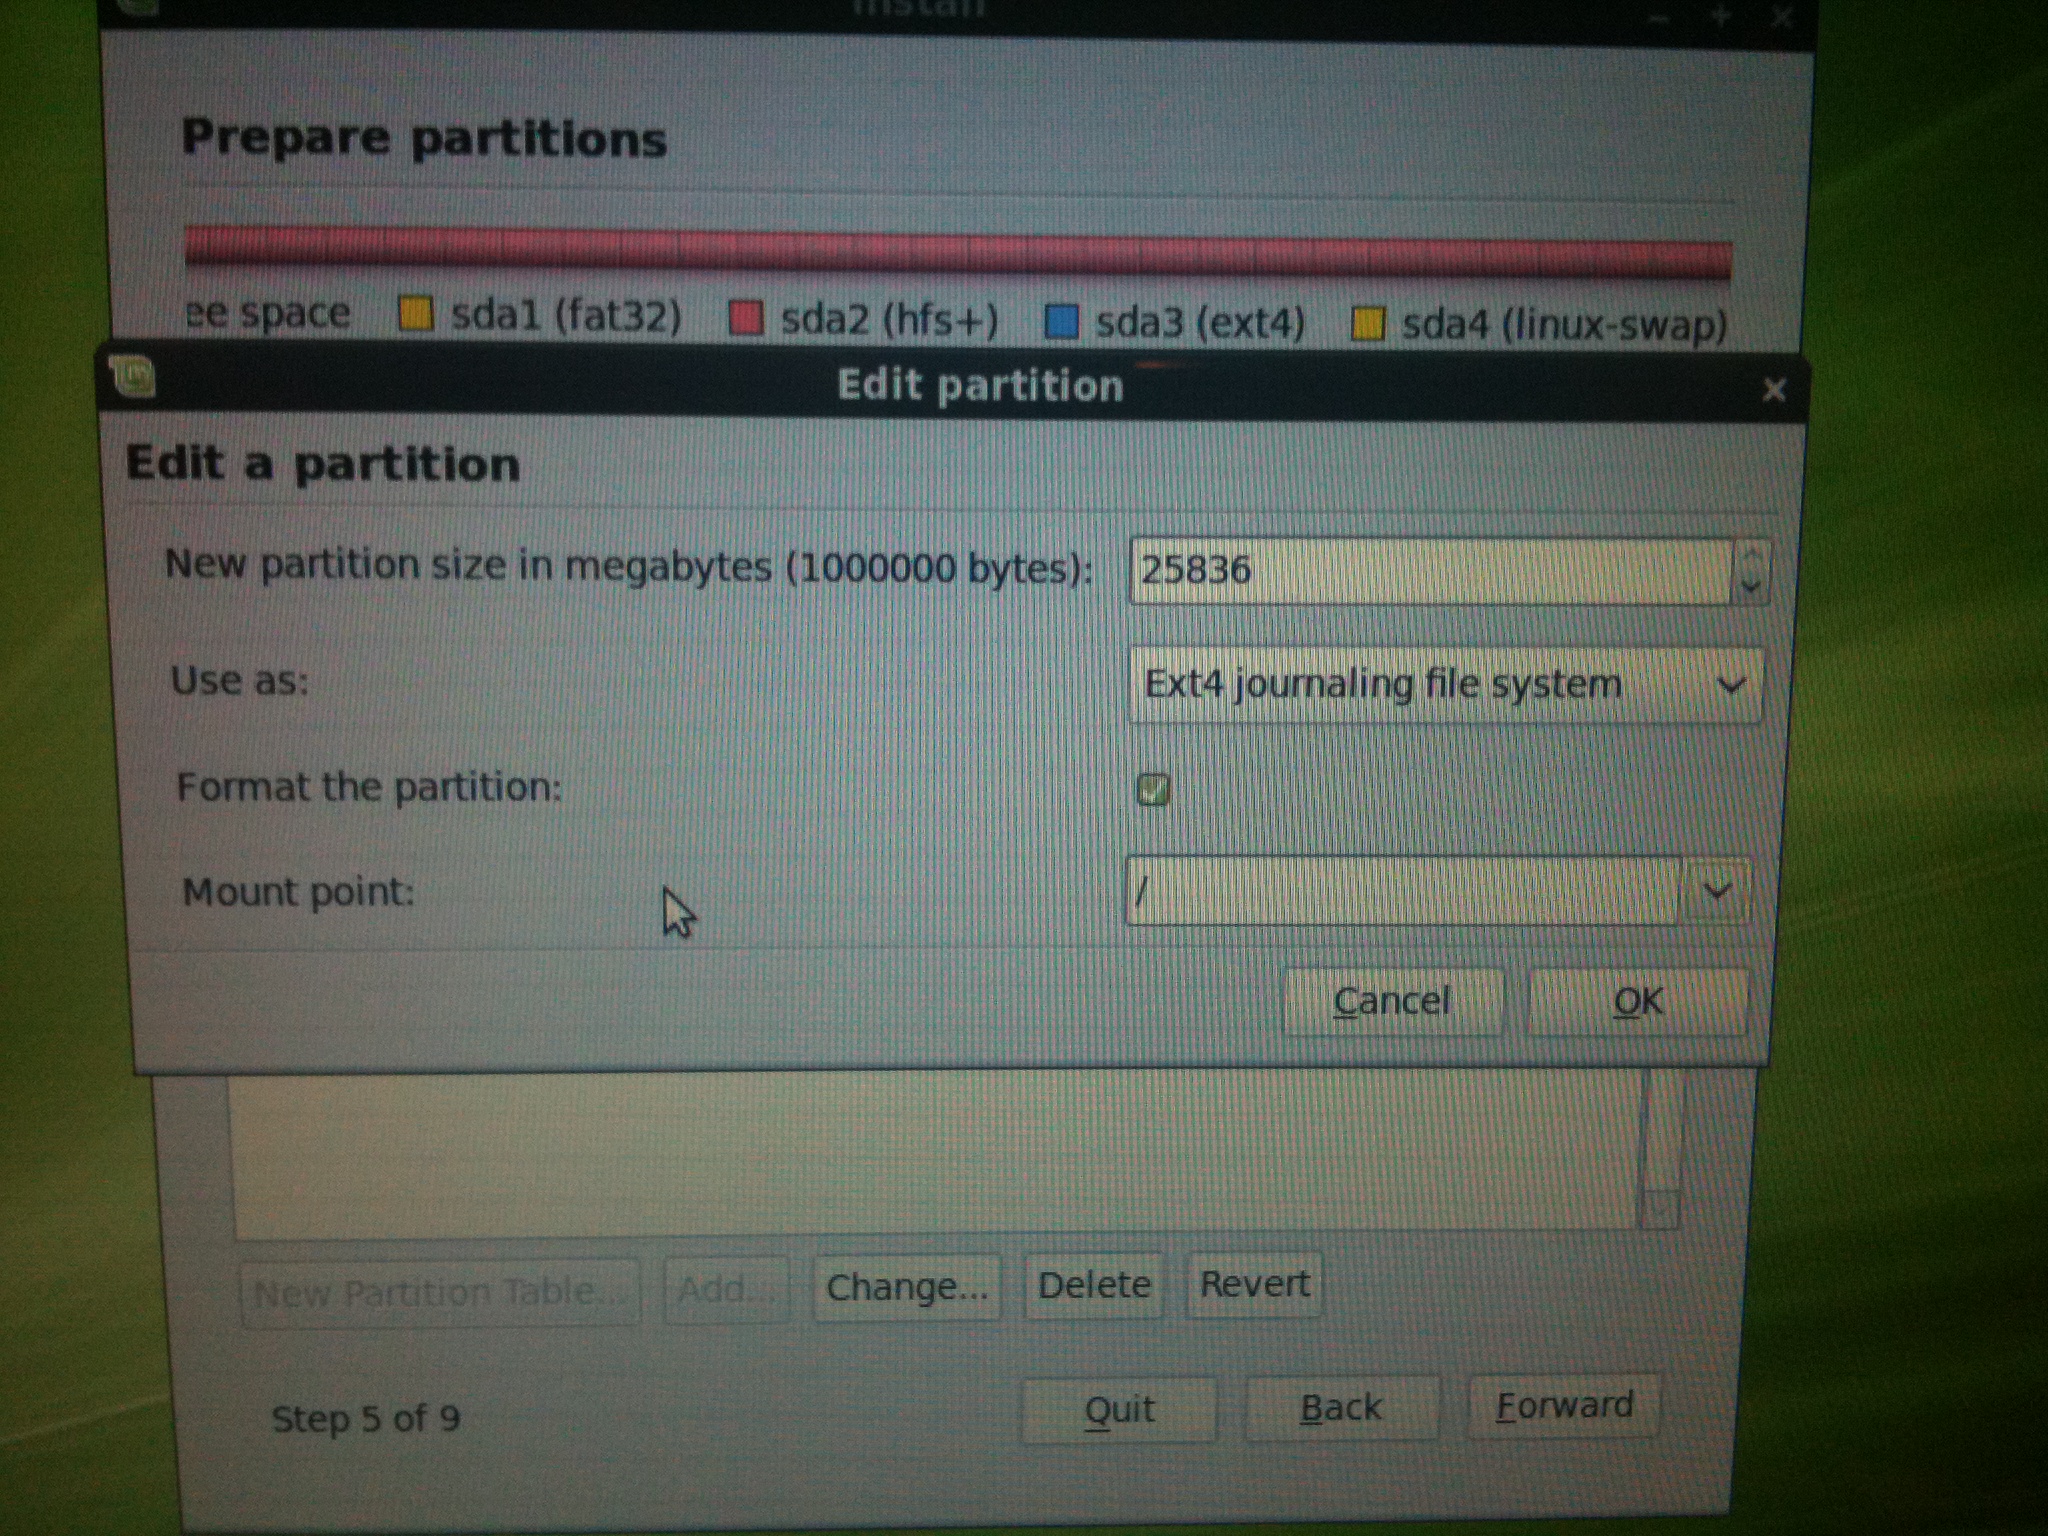
a. Select /dev/sda3 and press “Change…”
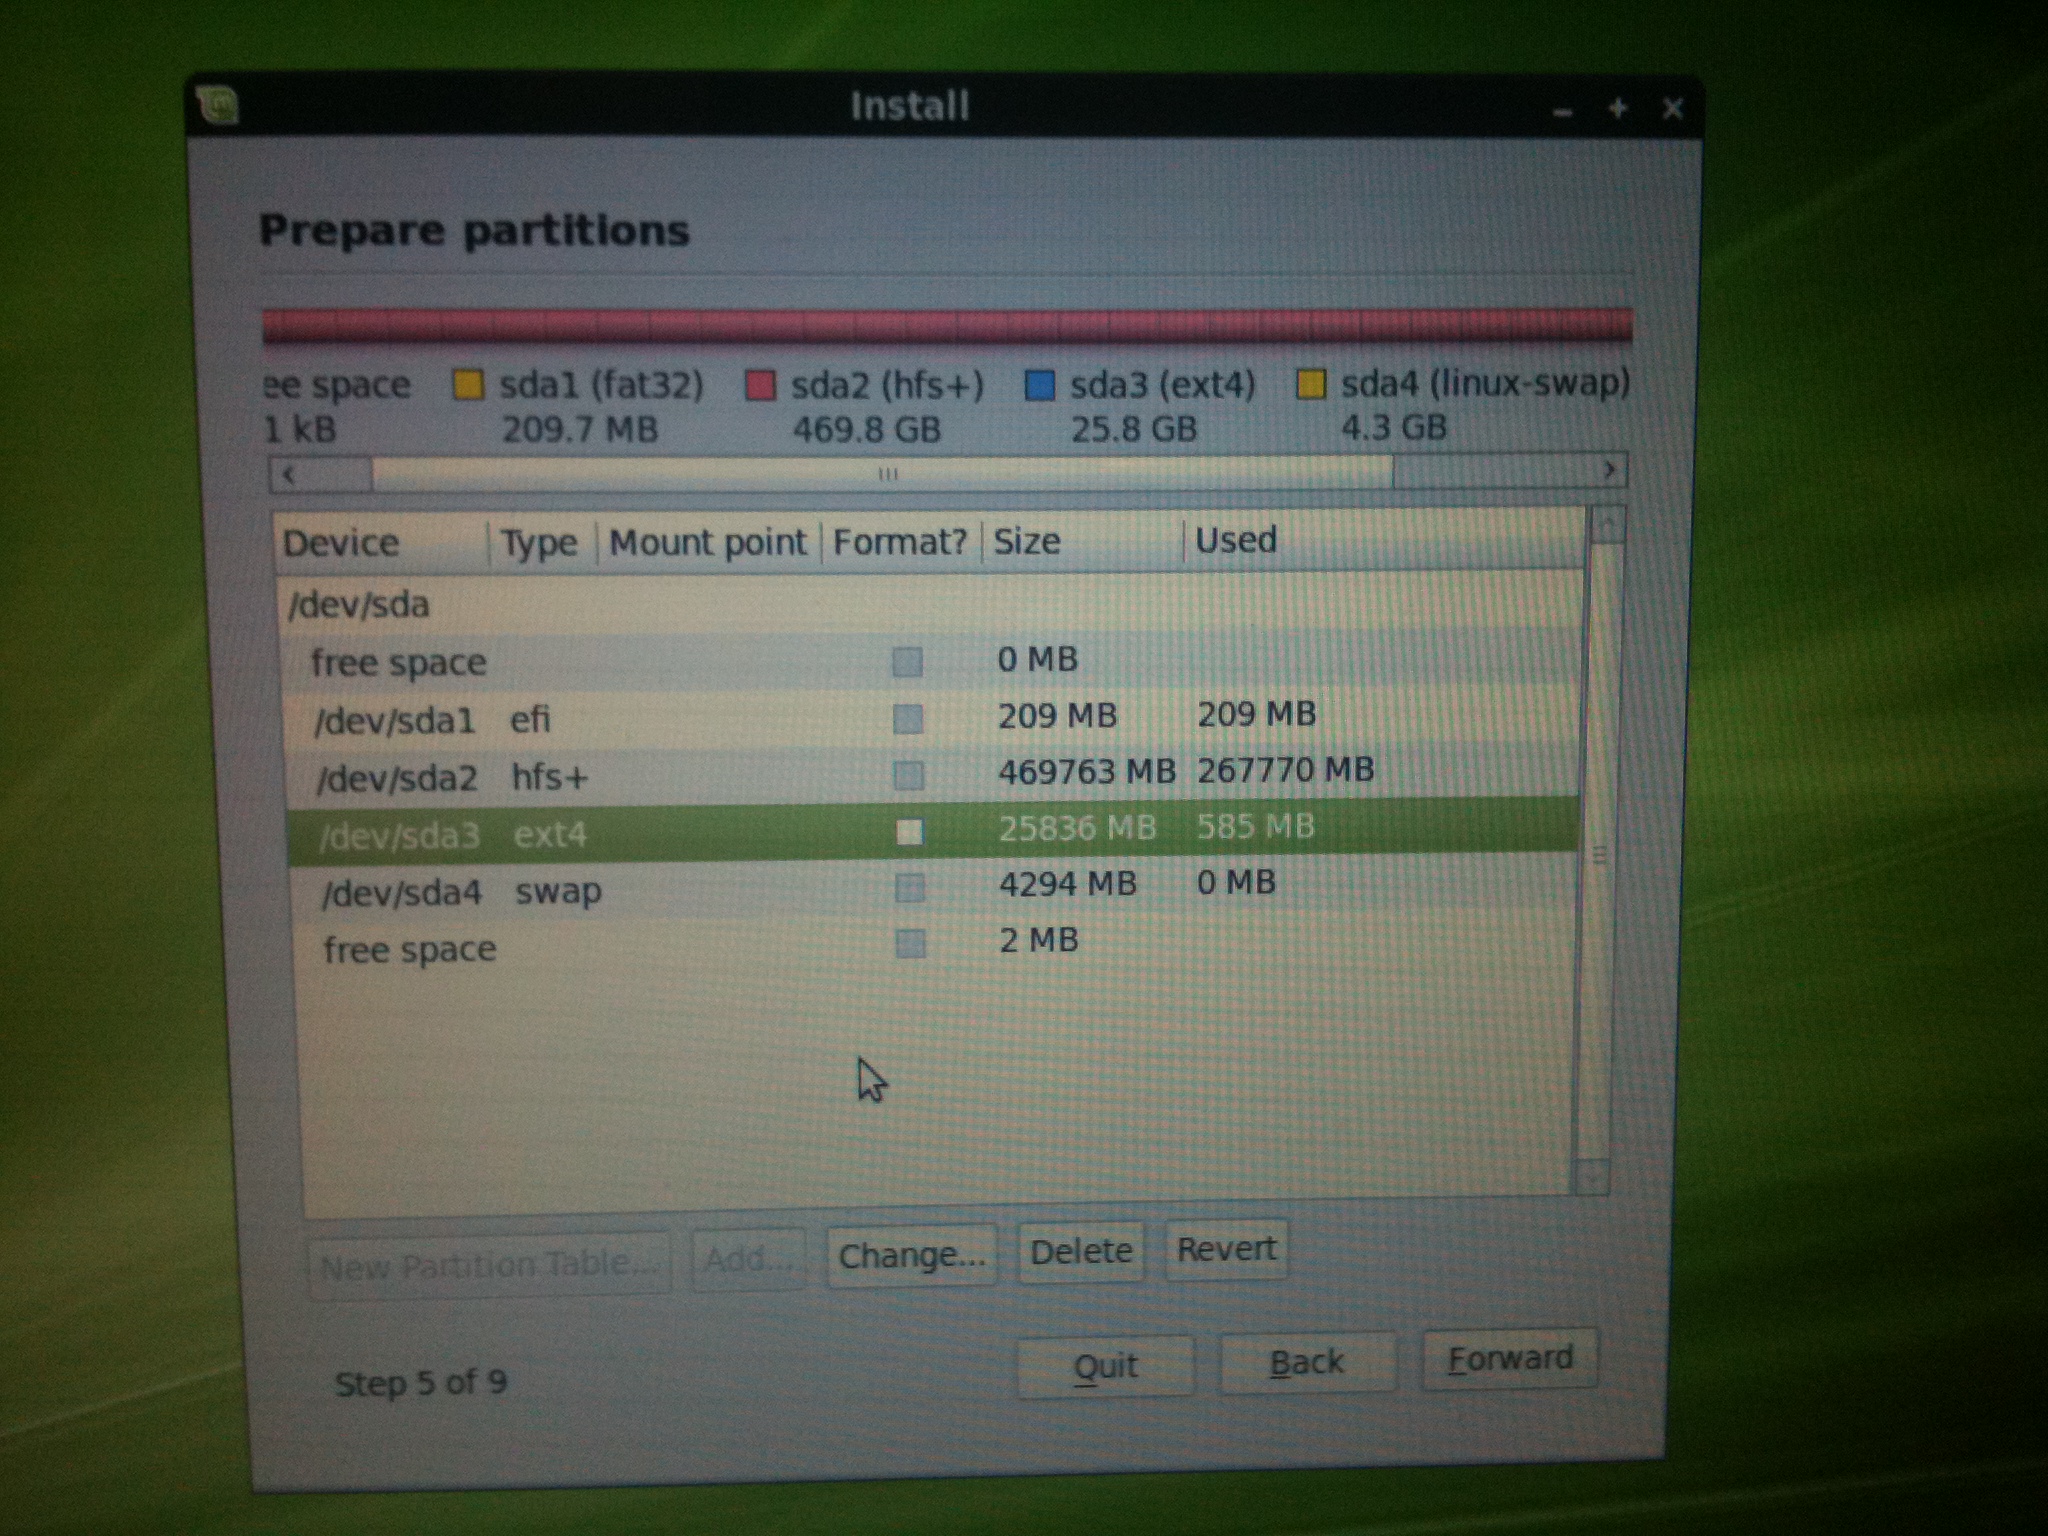
b. Choose ext4 Journaling; CHECK the “Format” box; mount at /
c. No change to Swap

d. Proceed with installation until you get to Step 8.
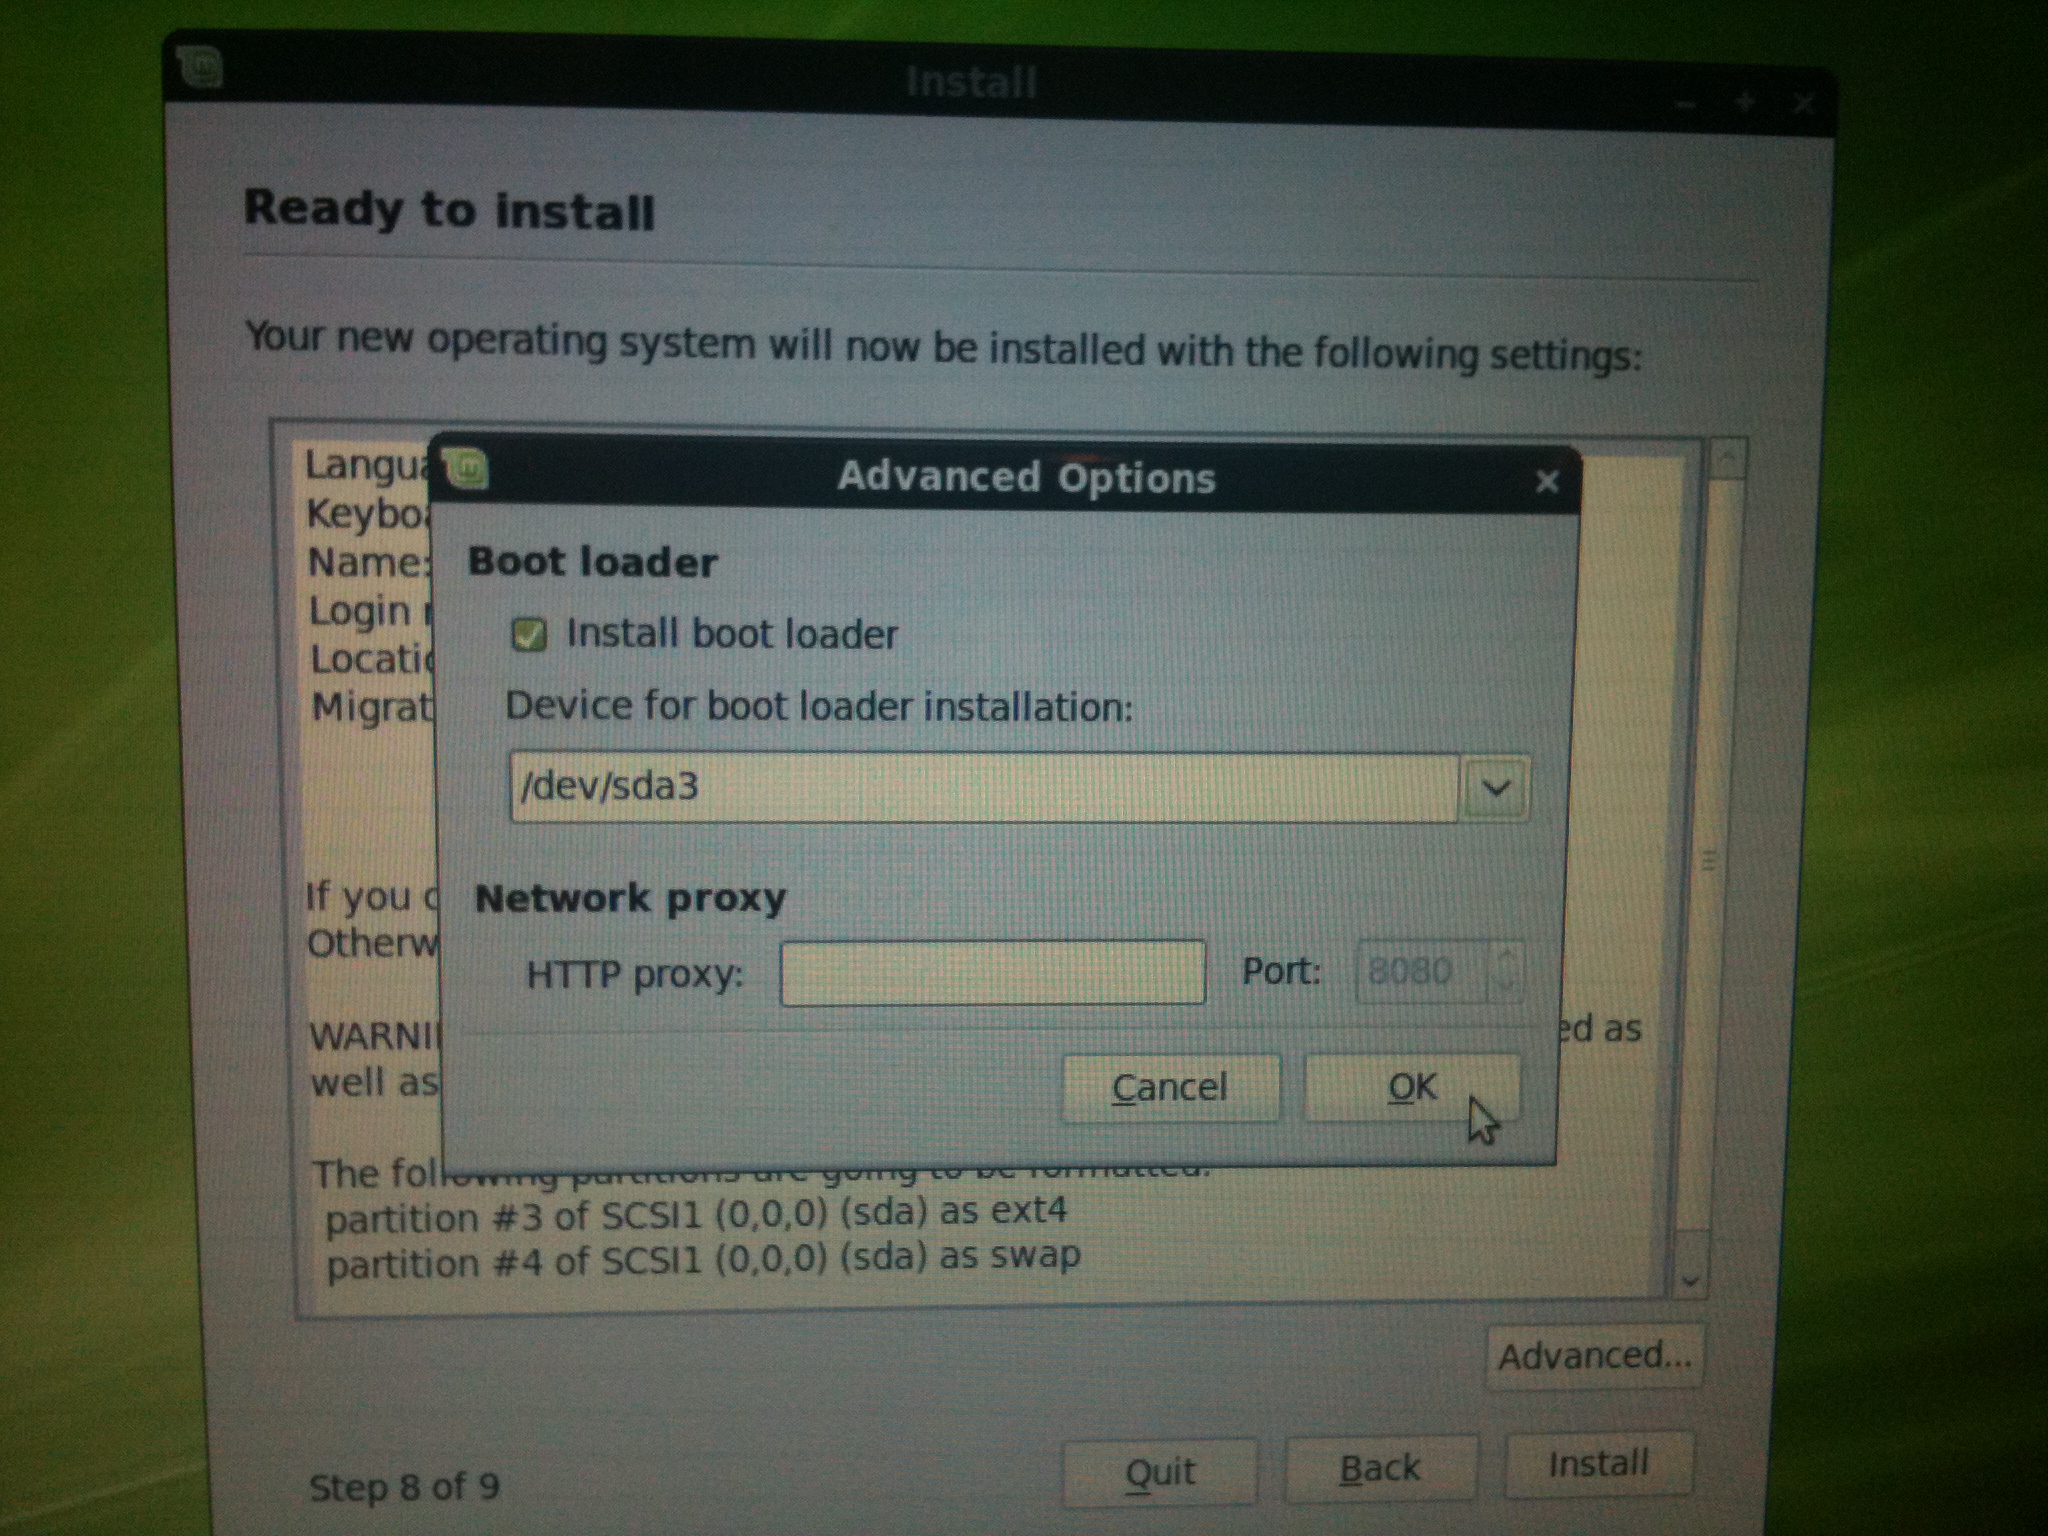
12. At Step 8, click “Advanced…” and choose to install boot loader at /dev/sda3.
13. Proceed with the installation! When installation is complete DO NOT hit “Restart.” Instead click on “Continue Testing.” Then in the Menu click quit, then click restart.
14. Upon restart, rEFIt should load.
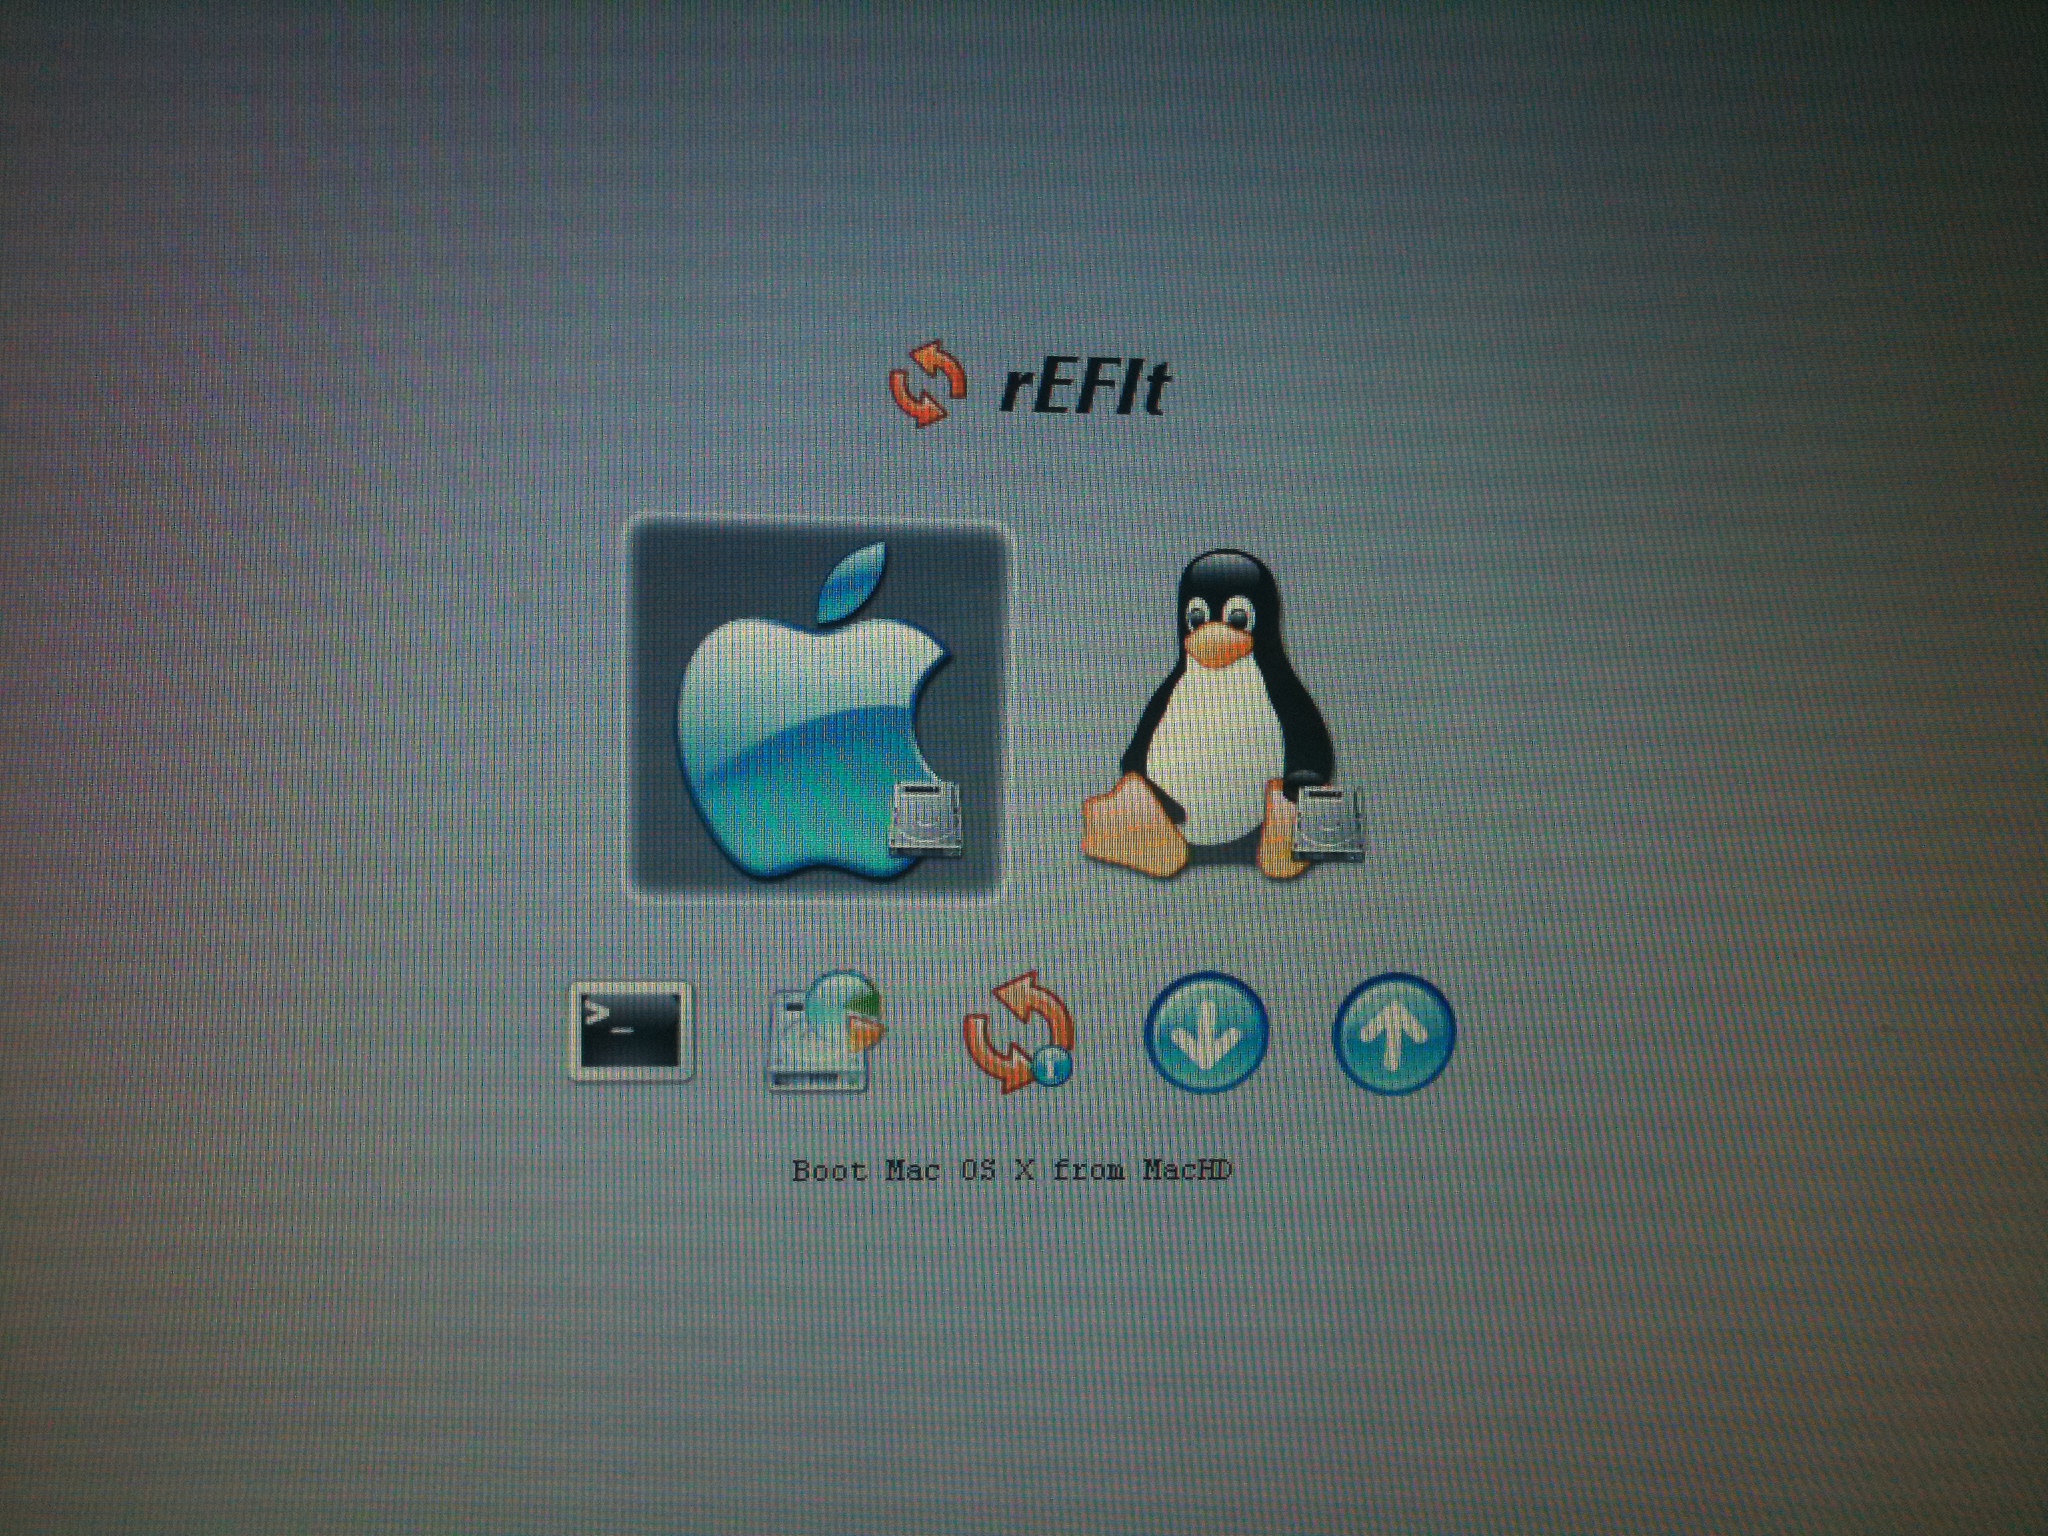
15. Use the down arrow key to launch the partition tool. When I did this, the partitions were already in Sync and there was no need for rEFIt to Synchronize! Sweet!

16. When I chose Linux from rEFIt it did NOT start up. I had to power down by holding the Power button. I then restarted and held down the OPTION key. I chose “Windows” and Linux Mint booted up. I restarted, launched Linux from rEFIt and it worked. I don’t know why it did not boot the first time. Just wanted to point this out in case someone had a similar experience. I also noticed that the Linux Mint Logo was no present but the five white/green buttons were there. No problem though, it loads fine.
17. Install your hardware drivers. Reboot. Update your system and you are good to go. You now have a fully functional MacBook Pro dual-booting Mac OS X and Linux Mint 9!
