I follow several amateur radio groups and one of the most common questions revolves around setting up a new radio and communicating on DSTAR. This post is designed to answer that question and provide starter files to get the neophyte up and running quickly.

If you already know the advantages of using your Icom radio in DR Mode and just want the files, here they are. These are in Excel format. You will have to save as a .csv file before copying to the SD Card in order to import them. These should work in all four radios but I have only verified that they can be imported to the 51 and 5100.

Read the rest of this entry »
Introduction

GMC’s flawed execution of wireless charging rendered the wireless charger in my 2017 Canyon Denali useless for charging my iPhone X.  Luckily, the 2018 GMC Sierra charger can be retrofitted into the 2017 Canyon with a few modifications.

Required Items
  • GMC Silverado Wireless Charger, part number 13521066. I purchased from gmpartsdirect.com and they did NOT require a Silverado VIN.
  • T15 Torx Screwdriver
  • Plastic Trim Removal Tools
  • Dremel Tool with cutting bit and sanding bits.
  • Black Electrical Tape
  • Adapter harness from pgamboa on gm-trucks.com.  Phil was great to work with.  Send him a private message on gm-trucks.com to order.

Continue reading for the instructions.

Read the rest of this entry »

IMG_0564

Installing an Icom ID-5100 in a 2017 GMC Canyon Denali

Introduction

This post documents how and where I installed my Icom ID-5100 into my brand new 2017 GMC Canyon Denali. My goal was a very clean, professional looking install with no wires cluttering up the interior of my truck. I’ve always been of the mind that if you are going to do something, do it right.  This requires you to drill holes, quite a few of them.

Planning:

I spent a lot of time figuring out exactly where each component of the radio was going to go. I then spent considerable time figuring out how all of the wires would travel, unseen throughout the truck. I took apart sections of the truck to see how I could get everything where I wanted it to go. A set of trim removal tools are worth their weight in gold for this! This process took me two months. I’m a measure twice, cut once kind of guy. It is also a brand new truck and I did not want to get half way through my install only to figure out my plan was not feasible. This install will require you to drill holes. There is no way around a clean install without drilling holes.

End State

When this install is finished, the components will be in the following locations:
– Radio Body – under the rear passenger seat with easy access to the SD Card
– Antenna – center of the roof with an NMO antenna
– Control Head – in the cubby hole forward of the gear shift. The RJ12 cable will be plugged into a custom keystone installed next to the cigarette lighter.
– Microphone – Attached to the left side of the front console face plate. The microphone is plugged into a custom RJ45 Keystone installed next to the USB port and aux port.
– External Speaker – underneath and in front of the rear seat.

Read the rest of this entry »

This post will document how to setup the DSTAR Commander image for use on a Raspberry Pi / DVMEGA hotspot.  I use a Mac.  Theses instructions demonstrate how I set up my hotspot using a Mac.  These hotspots are great to use and enable you to talk across the globe using an HT on low power.

Outline:
  1. Burn image to SD Card
  2. Boot your Pi and VNC into it
  3. Set up DSTAR Repeater
  4. Set up ircddb Gateway
  5. Set up text and email of system information
  6. Create Remote Control App
  7. Reboot and Test
  8. Secure your Pi (Change user password and VNC password)
  9. Change the Hostname of your Pi
  10. References
What you will need:
  • 16 GB or greater SD card. I love this Lexar card. I don’t recommend PNY. The one I bought failed in a couple of months.
  • SD Card Reader (The USB reader that came with my Lexar works great).
  • G4KLX image. I have used many of them and prefer DSTAR Commander.
  • A VNC Program. I use Jump Desktop on the Mac and iOS they all sync together and work great!
  • The Unarchiver application, free in the Mac App Store.
  • Software that will let you see devices connected to your network via ethernet. If, like me, you are using an Apple Time Capsule the Airport utility will only show you devices connected wirelessly. Use the iPhone app Fing to get the ip and MAC address of your Pi.

Read the rest of this entry »

Introduction

I love the Raspberry Pi! I am currently using one as a local DSTAR hotspot. It works great. I have tried several different images (Maryland-DSTAR, Western, and DSTAR Commander). I think I have settled on DSTAR Commander. I think I finally have everything working exactly how I want it to.

When making tweaks to the system, it is very important to make a backup of your current system so that you can easily go back to where you started if you messed something up. Additionally, if your SD Card fails (and it WILL), having a backup will enable you to quickly get your system back online.

I used to have to shut down the pi, pull the SD Card out, find my SD Card adapter, plug it into my Mac, make a backup, and then reverse the process to get my system online again.  Those days are over. You can make a backup of your pi and have the backup written to your regular PC all from the command line. Here is how to do it.

Bottom Line Up Front:

From your local machine, run the remote backup command:

ssh pi@xx.x.x.xx "sudo dd if=/dev/mmcblk0 bs=1M | gzip -" | dd of=~/Desktop/pibackup.gz

If you ever need to use your back up you cannot do it remotely (at least that I know of).  You will need to insert the SD card into your local machine and run the following commands:

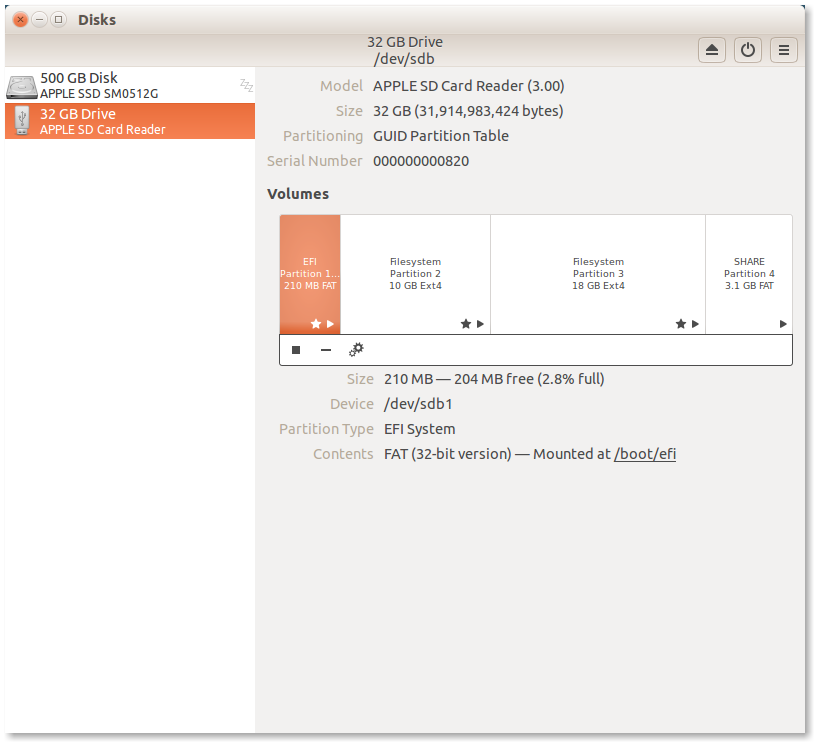
diskutil unmountDisk /dev/disk#
gzip -dc ~/Desktop/pibackup.gz | sudo dd of=/dev/rdisk# bs=1m conv=noerror,sync

Continue reading if you need much more detailed instructions on what this command does, what each piece of the command means, and how to get all of the necessary inputs.

Read the rest of this entry »

Thoughts on Star Wars VII

Posted: 2015-12-19 in Reviews
Tags:

tfa_poster_wide_header-1536x864-959818851016

Image Credit: starwars.com

Introduction

I saw Star Wars VII on Thursday night. I enjoyed the movie and was certainly entertained. However, the entire movie felt like a recycled menagerie of episodes IV, V, and VI.

It is clear that JJ Abrams is a fan and really wanted to respect and pay tribute to the original trilogy but I think he went too far.  Instead of paying respect to the original trilogy, he copied it.

I had very high expectations for this film. Many of them were fulfilled. What follows are the things that had me scratching my head during the film, interrupting my immersion in the experience. Also know that I have not read any of the books. I’m a huge Star Wars fan but have only seen the movies; that is my point of reference.

Spoilers follow, so if you have yet to see the movie and want to be surprised, do not proceed any further.

Read the rest of this entry »

GEEK ALERT! GEEK ALERT! GEEK ALERT!

I recently purchased an early 2015 13″ Ratina MacBook Pro. I wanted to do something with the SD Card slot and saw an ad for the Nifty MiniDrive. I decided I was going to install Ubuntu on the SD Card so that it was always available but without making any permanent modifications to my internal drive. This post will describe exactly what I did to accomplish this goal.

When complete, you will have Ubuntu installed to your SD card, rEFInd installed on your SD Card, and GRUB will be removed from your internal hard drive.  When booting into Ubuntu you will first use the Apple Boot Manager (by holding the “option” key) to get you to rEFInd, and then rEFInd will boot Ubuntu in verbose mode.

Eventually, I would like to remove rEFInd as well and just use the Apple StartUp Manager to boot directly into Ubuntu but I have not found a good tutorial yet.  In all honesty, I don’t understand enough about EFI booting to understand how the boot process is being completed without GRUB.  I just deleted GRUB from /dev/sda to see what would happen and found that not only did Ubuntu boot but it booted a lot faster without it!

Nifty MiniDrive

Nifty MiniDrive

Nifty MiniDrive installed in the SD Card slot of my rMBP

Nifty MiniDrive installed in the SD Card slot of my rMBP. The entire Ubuntu system, rEFInd, and my user files all reside inside that little red MicroSD Card.

Nifty MiniDrive Box

Nifty MiniDrive Box

Downloads

What you need

  • 32GB or greater micro SD Card
  • Nifty MiniDrive Adapter (not required. You can use any SD Card or MicroSD Card with adapter.
  • Ubuntu 15.04 iso
  • 8GB USB stick (to create the Ubuntu install USB)
  • A verified, and bootable backup of your system.

Create The Ubuntu Live USB

Create a bootable Ubuntu USB stick using these instructions on the Ubuntu download page.

Prepare SD Card

Use Disk Utility to create three partitions on the SD Card.

  • 10GB for the Ubuntu root partition (FAT32). Will be changed to ext4 during install of Ubuntu.
  • 18GB for your Home partition (FAT32).  Will be changed to ext4 during install of Ubuntu.
  • ~4GB for a Share partition (FAT32)
  • Select options and select GUID partition scheme.
  • Press Apply.

Install rEFInd onto the SD Card

  1. Open Terminal and type the following command
    diskutil list
  2. The output will look similar to this:
    $ diskutil list
    /dev/disk0
    #:                      TYPE NAME     SIZE      IDENTIFIER
    0:     GUID_partition_scheme          *500.3 GB disk0
    1:                       EFI EFI      209.7 MB  disk0s1
    2:         Apple_CoreStorage          499.4 GB  disk0s2
    3:    Apple_Boot Recovery HD          650.0 MB  disk0s3 
    
    /dev/disk1
    #:                      TYPE NAME     SIZE      IDENTIFIER
    0:         Apple_HFS MBP SSD          *499.1 GB disk1
                                 Logical Volume on disk0s2
                                 11B21249-47B3-4FF1-A807-AD81CEC8B910
                                 Unencrypted
    
    /dev/disk2
    #:                      TYPE NAME     SIZE      IDENTIFIER
    0:     GUID_partition_scheme          *31.9 GB  disk2
    1:                       EFI EFI      209.7 MB  disk2s1
    2:      Microsoft Basic Data UBUNTU   10.5 GB   disk2s2
    3:      Microsoft Basic Data HOME     18.1 GB   disk2s3
    4:      Microsoft Basic Data SHARE    3.1 GB    disk2s4
    $
  3. Above, you can see that the EFI partition on my 32GB flash drive is /dev/disk2s1.
  4. Type the following commands in Terminal to mount the EFI partition of the SD Card:
    mkdir /Volumes/efisd
    sudo mount -t msdos /dev/disk2s1 /Volumes/efisd
  5. Mount the rEFInd disk image.
  6. Drag the rEFInd EFI folder and copy it to the EFI partition of the SD Card by dragging and dropping. Unmount the rEFInd image.
  7. On the SD Card EFI folder, delete the 32-bit drivers and executables.
  8. Optionally, you can edit the rEFInd.conf file in order to remove the Recovery HD, and Legacy mode boot options.  Just open the rEFInd.conf file in a text editor and remove the “#” that precedes these two lines in the file.  They are not adjacent so you will have to scroll through and find them.
    scanfor internal,external,optical,manual
    dont_scan_volumes "Recovery HD"
  9. Once you make the edits to rEFInd.conf, save it and close it.
  10. OPTIONAL: With the EFI partition mounted you can change the icon to an Ubuntu icon (or any other icon you prefer.  Find an icon you like and apply it to the EFI folder.  I used an Ubuntu icns file I downloaded off of the internet.
  11. Eject the EFI folder.
  12. Copy the wireless driver to the share partition on your SD Card. Just drag the “brcmfmac43602-pcie.bin” file that you downloaded earlier to the SHARE partition on the Micro SD Card.

Install Ubuntu to the SD Card

  1. Ensure your Ubuntu Live USB is inserted.
  2. Reboot computer and press and hold the option key after you hear the startup chime. If you changed the icon of the EFI folder on the SD card, then your start up screen will look similar to mine. If you see two “EFI” sections, choose the one on the left.

    Start Up Manager before installing Ubuntu. Choose the LEFT EFIBoot.

    Start Up Manager before installing Ubuntu. Choose the LEFT EFIBoot.

  3. Select “Try Ubuntu” and let it boot up.
  4. Click on “Install Ubuntu” and follow the prompts until you get to Preparing to Install Ubuntu.
  5. Ensure that “Download updates while installing” and “Install this third-party software” are Unchecked. My installs failed when either were checked.
    Do not install updates or software
  6. When you get to Partitioning, choose “Something Else.”
  7. At the bottom of the window, select /dev/sdb2 as the location to install the boot loader (the same partition that you will install Ubuntu and mount at /. I think there is a bug in the installer because it always installs GRUB to the EFI partition of /dev/sda/. No worries because we will fix it after the install.
  8. Select the /dev/sdb2 partition (yours may be different, make sure you choose your 10GB Ubuntu partition). Press “Change…” In the drop down choose use as ext4 and set mount to “/”. Check format. Hit ok.
  9. Select /dev/sdb3 (may be different on your system, choose the “HOME” partition you created when we prepared the SD Card in OS X). Press “Change…” In the drop down choose use as ext4 and set mount to /home. Check format. Hit ok.
  10. Hit continue. You’ll get a warning that you will erase those two partitions. Hit ok.
  11. You’ll get another message that you have no Swap. That is fine, I have 16GB of RAM and doubt I will need it. Hit ok.
  12. Press “Install.”
  13. Once the install is complete choose to reboot.  You’ll get a message to remove the Installer USB and press enter.  Remove it and press enter.  The system will reboot. Reboot into OS X.

Remove GRUB From Your Internal Drive

  1. Once you are booted back into OS X, open a Terminal.
  2. Mount the EFI partition of your internal hard drive using the following commands.
    diskutil list
    Your EFI partition is probably disk0s1 but verify this from the output of diskutil list!
  3. Type the following commands in Terminal to mount the EFI partition of your internal HD:
    mkdir /Volumes/efi
    sudo mount -t msdos /dev/disk0s1 /Volumes/efi
  4. The EFI partition will mount.  Open it with the Finder.
  5. Open the EFI Folder.  There will be two folders: APPLE and UBUNTU
  6. Delete the UBUNTU folder ONLY
  7. Eject the EFI volume.
  8. Restart the computer.
  9. Press the “option” key after you hear the start up chime and choose “EFIBoot.” Mine looks like this:

    Apple Start Up Manager

    Apple Start Up Manager

  10. On the rEFInd Menu Choose Ubuntu and press enter.  Your system will load.  Enter your password and you will be logged in to Ubuntu. My rEFInd Menu looks like this:

    rEFInd Menu

    rEFInd Menu

  11. If you open the “Disks” application in Ubuntu you can see how your partitions are laid out.  Below is a picture of my final set up.

    Final partition setup in Ubuntu

    Final partition setup in Ubuntu

Get Your Ubuntu WiFi Working

  1. Open Terminal and enter the following commands:
    cd /lib/firmware/brcm
    sudo cp /media/YOURUSERNAME/SHARE/brcmfmac43602-pcie.bin .
  2. Reboot.
  3. WiFi should be working and you should be able to update your software.
  4. Reboot after updates have been applied and enjoy Ubuntu running off your SD Card!

Fixes Still Required

  1. 5Ghz WiFi does not work.  Only 2.4Ghz.
  2. Trackpad does not work perfectly.  No two-finger scrolling or two-finger right clicking.
    1. Go to Github and download the zip file (on the right hand side).  Extract the archive.  Open a terminal go to the directory of the archive.  Follow the instructions in the readme file and reboot.  Works like a charm!
    2. I noticed that after an update, I had to re-apply this fix.  So bookmark the github link.
  3. I’d like to figure out a way to get rid of rEFInd but have not figured that out yet.

I hope you found this tutorial helpful.  Please leave a comment if it helped or if you have any questions.

References

Military Whistle

Posted: 2013-05-19 in Life

On Saturday I coached my last soccer game for a while. I’ve never played organized soccer before and I can count on one hand the number of times I’ve ever played soccer.

Two years ago when John wanted to play I volunteered to be an assistant coach. The league did not have enough volunteer parents and they asked my to be a head coach. I reluctantly accepted and then proceeded to google “how to play soccer” and “how to coach soccer.” I watched every YouTube video I could find. I was terrified at my first practice and eventually settled into a rhythm. Apparently I did a pretty good job because I had a lot of repeat players.

Yesterday, one of my players presented this whistle to me as a going away present. To say I was touched is an understatement. Hopefully I’ll have the time to coach in Georgia.

20130519-190556.jpg

20130519-190607.jpg

Oral Comps

Posted: 2013-05-13 in Uncategorized
Tags:

On Wednesday, 8 May 2013, I successfully passed my SAMS Oral Comprehensive Exam. During the two-hour exam I presented my monograph (The Transatlantic Essay Contest and the Planning Principles of the North African Campaign), conducted an operational analysis of the Meuse-Argonne Campaign (including a sketch), and had a great conversation about theory and doctrine. Graduation day is 23 May 2013 where I will be awarded my third Masters degree. This one in Military Arts and Science.

Image